Replacing a zipper looks simple until the new one arrives several centimeters too long. A small measuring error can leave excess teeth, a misplaced stop, or a garment that will not close smoothly. The key is measuring the zipper chain, not the surrounding fabric or the full tape. For most standard zippers, measure from the top stop to the bottom stop. If either stop is missing, record exactly where the usable teeth begin and end.
This detail matters beyond appearance. WRAP’s Valuing Our Clothes report found that extending clothing’s active life by nine months could reduce its carbon, water, and waste footprints by around 20–30%. Repair is practical, but only when the replacement part fits. This guide explains how to measure zipper length correctly for replacement, identify open-end and closed-end styles, and share useful measurements when ordering. Check the zipper while it lies flat, with the slider parked safely away from the measuring points. Keep the tape straight. Note the zipper type, chain length, and whether the bottom separates. Do not assume the fabric seam length equals the zipper length; sometimes it does, often it does not. One honest caveat: worn stops and curled tape can make an exact reading difficult. Measure twice, compare both sides, and record any uncertainty before buying.
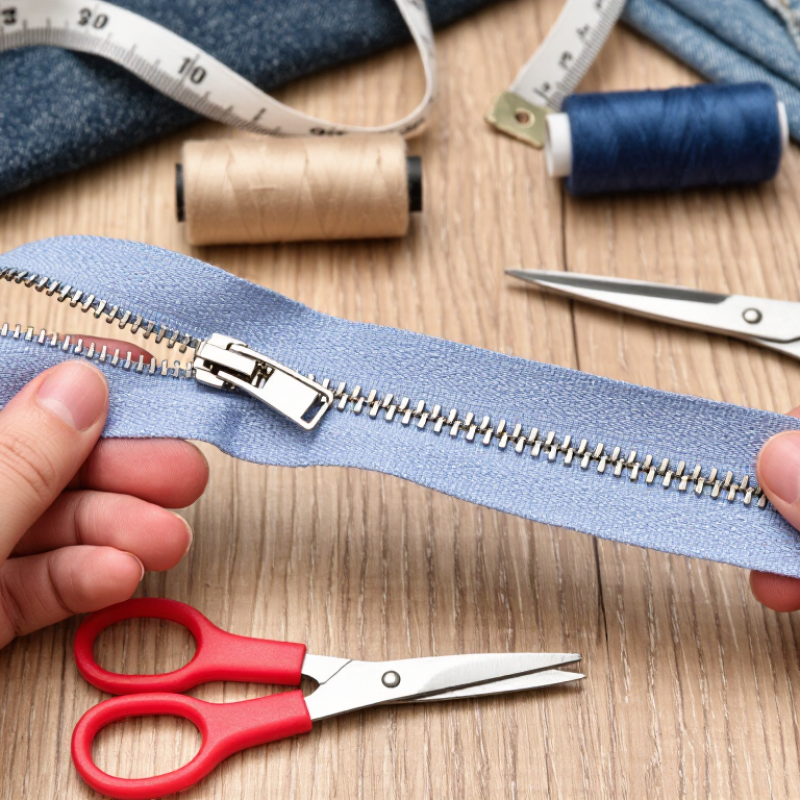
Before measuring, identify the zipper type and its construction. A replacement must match more than the visible length. Check whether it is a coil, molded-tooth, or metal-tooth zipper. Then determine whether it separates at the bottom or remains closed. Look closely at the slider, top stops, bottom stop, and fabric tape. These parts reveal how the zipper was built and how it operates.
Coil zippers have flexible spiral teeth, often made from nylon or polyester. Molded-tooth zippers show evenly spaced plastic teeth with a firm, regular shape. Metal-tooth zippers feel heavier and create a sharper clicking sound. Invisible zippers hide most teeth behind the tape. Do not measure only the teeth. Measure from the top stop to the bottom stop, excluding the fabric beyond those points. I once measured the full tape and ordered a zipper that was too long. That small mistake changed the garment’s alignment.
Tips: Photograph both sides before removal. Feel the teeth carefully. Check the slider’s shape and movement. A damaged slider can make a good zipper seem faulty. Compare the old zipper’s width with the replacement, because similar lengths may use different constructions. If the bottom stop is missing, estimate its original position from the seam and stitching. Measuring twice is sensible, though I still occasionally question the first result.
Accurate zipper measurement begins at the hardware, not the garment edge. Place the zipper flat on a table. Keep it fully closed without stretching the tape. Start at the top stop, where the slider begins its travel. Do not measure from the fabric seam, collar, or waistband. These areas often include extra material.
End at the bottom stop for a closed-end zipper. For an open-end zipper, measure to the bottom insertion box or final functional end. The zipper teeth, not the loose tape, define the working length. A 24-inch zipper may measure differently if you include seam allowance. This small error can prevent proper installation.
ASTM D2061 identifies zipper performance and construction measurements, reinforcing the need for consistent reference points. Market research from Grand View Research estimated the global zipper market above 15 billion U.S. dollars in 2023. That scale reflects how frequently replacement accuracy matters across apparel and home textiles. Yet published market data does not replace hands-on checking.
I measure twice.
After recording the length, compare the zipper type, tooth size, and opening design. Measure the garment opening separately. It should usually match the zipper’s usable length, not the entire tape length. I still recheck older garments because stretched fabric can distort the opening. That extra check feels unnecessary, but it prevents a surprisingly common mismatch.
How to Measure Zipper Length Correctly for Replacement?
Measure along the zipper teeth or coil, not along the fabric tape. Lay the zipper flat without stretching it. Start at the top stopping point and follow the center line to the bottom stopping point. Do not include the fabric beyond either stop. That extra tape can add several centimeters and cause a replacement zipper to sit incorrectly. For a separating zipper, measure from the top stop to the bottom insertion point. Check twice. Small errors matter.
The teeth or coil are the working length.
This method matches practical garment-repair guidance and supports consistent component specification under ASTM D2061, which covers zipper testing terminology and performance measurements. The Textile Exchange Materials Market Report 2024 states that polyester represented about 57% of global fiber production in 2023. This matters because polyester and nylon coils can feel different during measuring. A soft coil may compress under a ruler, so use light pressure and keep the tape straight. Metal and molded teeth usually provide a clearer centerline.
Measure the closed zipper when possible. Photograph the measurement beside a ruler, and record whether the zipper is closed-end or separating. A common mistake is measuring from the very edge of the garment opening. That point may not match the zipper’s actual stop. I still recheck old garments because worn sliders, bent stops, or uneven sewing can disguise the original length. Replacement sizing is not perfectly forgiving.
How to Measure Zipper Length Correctly for Replacement?
Measure the zipper while the garment lies flat and relaxed. Keep it flat. The usable length runs between the top and bottom stops, not between the tape ends. Place a rigid ruler along the teeth or coil. Avoid pulling the tape, because tension can add several misleading millimeters. Record the measurement in centimeters and inches if ordering from different suppliers.
Inspect every stop before measuring. A top stop may sit below the tape edge, while a bottom stop can be partly hidden inside a seam. Measure from stop to stop, then measure the full tape length separately. These numbers are not always identical. Some sellers list functional zipper length, while others list tape length. Confirm which measurement they use. This small detail prevents an expensive mismatch.
Installation needs also affect the replacement size. Measure the garment opening independently, especially if the old zipper is stretched or damaged. Leave room for seam allowances, stitching, and the slider’s movement. A separating zipper may need extra tape near the bottom for accurate insertion. A closed-end zipper usually cannot be shortened safely at the bottom. I once trusted the tape edge instead of the stop position, and the replacement sat too low. Recheck the measurement after removing the old zipper; the seam can reveal a different opening length. Perfect measurement is uncommon, so document both figures before ordering.
Lay the zipper flat on a table before measuring it. Do not pull the tape or bend the zipper. For a closed-end zipper, measure from the top stop to the bottom stop. For an open-end zipper, measure from the top stop to the end of the insertion pin. Measure the functional zipper length, not the extra fabric beyond the stops.
Write the result in millimeters or inches, and record the unit clearly. A zipper may look correct but still fail if its teeth, tape width, or slider type differ. Check these details beside the length. The teeth should match in size and form. The slider must move smoothly over the same tooth structure. Small differences matter.
In repair work, I have seen people measure the old zipper while it was attached to a curved jacket. That often produced a longer reading. A second measurement on a flat surface revealed the error. This is easy to overlook. It is also why replacement length should be compared with the garment opening. If the opening is shorter, the zipper may bunch or strain. If it is longer, the ends may sit awkwardly.
Leave a small note about worn stops or stretched tape. These defects can change the apparent length. When the measurement feels uncertain, check it again before ordering. One extra minute is cheaper than removing a wrongly fitted zipper.
Identify the zipper type, tooth material, and bottom design. Check whether it separates or stays closed.
Coil zippers have flexible spiral teeth. Molded teeth look regular and plastic. Metal teeth feel heavier and click sharply.
Start at the top stop, where the slider begins moving. Do not start at the garment edge or seam.
Measure to the bottom stop on a closed-end zipper. For an open-end zipper, measure to the insertion box or final working end.
No. Measure only the functional length between the hardware stops. Extra tape can make the replacement too long.
Lay it flat without stretching or bending it. A curved jacket can produce a misleading measurement.
Compare tooth size, tooth structure, tape width, slider shape, and opening design. Similar lengths may still fit differently.
Measure the opening separately. It should usually match the zipper’s usable length, not the entire tape.
Estimate its original position from the seam and stitching. Mark the estimate clearly, then measure again.
A second check can reveal stretched tape, worn stops, or a wrong starting point. One extra minute helps. I still question my first result sometimes.
Measuring a zipper for replacement starts with identifying its type and construction, such as a separating or closed-end zipper and a coil or tooth design. This helps determine which parts should be measured and how the finished length is defined. Lay the zipper flat without stretching it, then locate the correct starting and ending points. In most cases, the measurement follows the usable fastener from the top stop to the bottom stop, rather than including extra fabric beyond the zipper.
To understand how to measure zipper length correctly for replacement, measure along the teeth or coil, keeping the tape measure straight and close to the fastener. Note whether the stops, zipper tape, or installation allowances affect the fit, since these details can differ by garment or project. Before choosing a replacement, measure again and compare the result with the space available. Checking the zipper type, measurement points, and installation needs together makes it easier to select a zipper that fits and functions properly.

Gemify zipper