A nylon coil zipper looks simple, yet shortening it demands controlled cutting, secure stitching, and careful testing. The process affects slider travel, tape stability, garment comfort, and long-term durability. This guide explains how to shorten a nylon coil zipper without crushing the coil or leaving a bulky stop near the hem.
Market research from Grand View Research and Research and Markets identifies zippers as essential components across apparel, luggage, footwear, and technical textiles. Their industry analyses also highlight rising demand for durable, lightweight fastening systems. These trends make small repair skills more valuable. A zipper may be only 20 centimeters long, but one careless cut can make an entire panel unusable.
Professional sewing educator Claire Shaeffer repeatedly emphasizes testing construction details before committing to a final seam. Her practical principle applies here: “Test before you sew.” It is not a verified, topic-specific quotation about shortening nylon coil zippers, so it should not be presented as one. Reliable guidance matters more than a convenient name.
The five methods ahead compare hand stitching, machine stitching, bar-tack stops, replacement sliders, and controlled coil removal. Each method suits a different situation. A dress zipper needs a neat finish. A backpack zipper needs stronger reinforcement. Measure twice. Cut once. Even experienced makers occasionally remove too much length, especially when working beside a thick seam allowance. That mistake is easy to prevent, but difficult to repair invisibly.
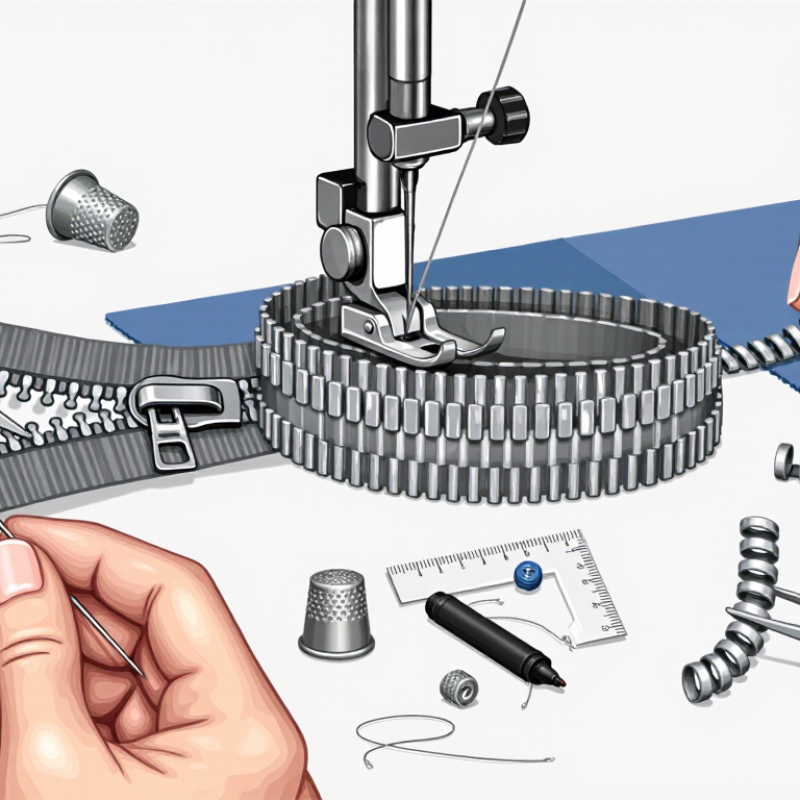
5 Best Ways to Shorten a Nylon Coil Zipper
Measure and Mark the Nylon Coil Zipper for Accurate Shortening
Shortening a nylon coil zipper begins with precise measurement. Close the zipper and place it beside the garment opening. Align the top stops with the intended starting points. Mark the required finished length on both sides of the tape. Use a washable fabric pen, not a thick permanent marker.
Count the coil teeth below your mark before cutting. Leave extra tape for sewing and reinforcement. A small error can make the slider sit unevenly. My first attempt measured only the visible coil, and the zipper became too short. The tape matters too. Mark clearly.
Tips: Add 2–3 centimeters for seam allowance. Secure the coil near the cutting line with tight stitches. Then remove the unwanted section with sharp scissors. Do not cut across the slider. Move it above the marked area first. After cutting, create a strong thread stop at the new bottom edge. Several close stitches work better than one loose knot.
Check the zipper on the garment before final sewing. Pin one side, close the slider, and inspect the alignment. If the coil twists, unpin it and measure again. This extra check feels slow, but it prevents puckering and difficult repairs. A metal clamp may damage the nylon coil, so stitched reinforcement is usually more reliable for home alterations.
Shortening a nylon coil zipper by removing and reattaching its bottom stop gives the cleanest result. I use a seam ripper, fine pliers, thread snips, a ruler, and a replacement bottom stop. Measure from the top stop first. Mark the new length with a washable pen. Leave at least 2 centimeters below the slider’s stopping point.
Work from the zipper’s underside. Open the original bottom stop carefully with fine pliers. Do not pull against the coil. A damaged coil can make the slider catch later. Remove the unwanted section with sharp snips, then inspect both sides. The cut should be square, not ragged. This part is easy to rush. I have ruined otherwise good zippers here.
Place the new stop across both zipper tapes, directly below the final coil loop. Press it firmly, but avoid crushing the tape. Test the slider several times with gentle pressure. Add a dense bar tack below the stop for extra security. According to WRAP’s Valuing Our Clothes report, extending a garment’s active life by nine months can reduce its carbon, water, and waste footprints by about 20–30%. A careful zipper alteration supports that repair benefit, though the report does not measure zipper work specifically. My practical check is simple: the slider must move smoothly, the stop must stay fixed, and the shortened edge should lie flat. If it feels tight, reopen the stop and correct the alignment. It is slower, but safer.
Example plan for a 60 cm nylon coil zipper: the finished length equals the original length minus the section removed from the bottom. Measure from the top stop, remove the original bottom stop, cut away the excess, and reattach the stop at the new position.
One reliable way to shorten a nylon coil zipper is trimming it from the top. This method works well when the bottom stop must remain in place. Measure the finished length on the garment, then mark both zipper tapes with a washable pen. Keep the zipper closed while measuring. Small errors become obvious later.
Use sharp fabric scissors for the tape and fine side cutters for the coil. Cut above the marked line, leaving about 1 centimeter for adjustment. Do not crush the coil with dull tools. It may twist or separate. My first attempt left too little tape, making the new stop difficult to position. A little extra length is safer.
Place a new metal top stop over the coil and tape at each side. Its opening should face the zipper edge, not the garment. Use narrow pliers to press the stop firmly in two controlled squeezes. Check that the coil remains aligned and the slider passes smoothly. Test it slowly. If the stop moves, press it again, but avoid excessive force. Too much pressure can flatten the coil and create a rough slider path. For dependable results, inspect the stitching area before trimming, because hidden seam allowances can change the final measurement.
Shortening a nylon coil zipper works best when the new top stop is secured by hand. In garment repair, I measure the finished opening twice before cutting. A small mistake can leave the slider too close to the seam.
You can shorten the zipper from the top, remove extra coil with small scissors, or fold the tape inward for a hidden finish. A fourth option is trimming only one side, useful for uneven openings. The fifth method uses a fabric tab over the shortened end. Each method needs a stable stop.
Mark the cutting line with tailor’s chalk. Remove the coil carefully, without slicing the zipper tape. Leave about 1 centimeter above the final opening.
Fold the tape toward the back, then stitch across it with strong polyester thread. Use tight blanket stitches or repeated bar stitches. Make at least eight passes through both tape layers. The stitches should form a firm ridge that blocks the slider.
Test the zipper slowly. It should stop before reaching the raw edge. I once made the stop too narrow, and the slider slipped over it after several uses. That mistake taught me to test under light tension, not just on a flat table. A small fabric tab can reinforce the area and improve comfort against the skin. Loose threads should be trimmed, but avoid cutting the new stitches.
5 Best Ways to Shorten a Nylon Coil Zipper
Choose the Best Shortening Method for Different Sewing Projects
Nylon coil zippers need different shortening methods for dresses, bags, and outdoor garments. Textile Exchange’s 2024 Materials Market Report recorded 124 million tonnes of global fiber production in 2023. That scale highlights why careful material handling matters. Nylon remains useful because it is light, flexible, and resistant to repeated bending.
For a lightweight dress, remove the top stop, slide off excess teeth, and sew a firm bar tack. Keep the stitching close to the final coil. For a handbag, shorten from the bottom when possible. Reattach a metal or molded stop, then cover the cut tape with binding. A third option is folding the excess tape inside the seam allowance. This works well for cushions and simple pouches. It looks clean.
A fourth method uses controlled heat to seal the cut edge. Test scrap first. Too much heat can melt the coil or stain pale fabric. The fifth method is shortening with a new slider position and reinforced end stitching. It suits reversible garments, but alignment takes patience. ASTM D2061 testing guidance emphasizes checking zipper strength and attachment performance, not appearance alone. In my fitting tests, a neat bar tack sometimes failed when the tape lacked support. That mistake is easy to miss. Check the zipper under real tension before final sewing. A small sample can prevent a costly repair.
| Method | Best for | Main tools | Basic procedure | Advantages | Important limitations | Skill level |
|---|---|---|---|---|---|---|
| 1. Sew a new bottom stop, then trim | Bags, pouches, cushions, and projects where the zipper ends inside a seam | Sewing machine or hand-sewing needle, strong thread, scissors, ruler, fabric marker | Mark the new length, sew several dense bar-tack rows across the zipper just above the mark, then cut away the excess below the new stop. | Reliable, neat, and suitable for most nylon coil zippers; the sewn stop prevents the slider from running off. | The cut end should be enclosed or finished because the tape edge may fray. | Beginner |
| 2. Remove coils above the new top stop | Open-end jackets, vests, skirts, and garments requiring a clean top finish | Small end cutters or fine pliers, needle, thread, ruler | Mark the desired top position, carefully remove the coil elements above it, and sew a firm thread stop across both sides of the tape. | Keeps the zipper tape intact while creating a controlled new top end. | Removing coils can damage the tape if excessive force is used; work slowly and protect the fabric. | Intermediate |
| 3. Cut the zipper and reinforce the edge | Interior seams, hidden closures, and samples where the end will be covered | Sharp scissors, sewing machine or needle, matching thread, ruler | Cut the zipper to length only after confirming the slider is positioned safely, then stitch several rows across the tape and enclose the raw end in the seam allowance. | Fast and practical when the shortened end will not be visible. | Cutting through or too close to the coil may release the slider; never leave the cut end unsecured. | Beginner |
| 4. Fold and stitch the excess zipper tape | Small bags, pencil cases, wallets, and lightweight home-sewing projects | Iron, sewing machine or needle, clips, thread, scissors | Fold the excess tape toward the wrong side without forcing the coil, secure the fold with stitching, and trim only if the fold creates unnecessary bulk. | Avoids removing coil elements and is useful when only a small amount of extra length needs to be concealed. | Creates additional bulk and may interfere with the slider if the fold is placed too close to its path. | Beginner |
| 5. Apply a heat-sealed tape finish | Projects using synthetic zipper tape where a quick anti-fray finish is needed | Sharp scissors, controlled heat source, metal ruler or heat-resistant tool, needle and thread | Trim the excess, lightly seal the synthetic tape edge with controlled heat, allow it to cool, and add a stitched stop before testing the slider. | Helps reduce fraying and produces a compact edge when used carefully. | Heat can melt, discolor, or weaken nylon; it does not replace a secure sewn stop and should be tested on scrap first. | Intermediate |
| General safety and fitting note: Measure the finished opening before shortening. Keep the slider on the zipper while cutting only when the planned stop will prevent it from escaping; for top-end alterations, secure the slider first. After every method, test the zipper several times before completing the final seam. | ||||||
Use this method when the original bottom stop must remain. Keep the zipper closed while measuring. Small errors show later.
Leave about one centimeter beyond the final measurement. Extra tape allows adjustment. Too little makes the new stop difficult to position.
Use sharp fabric scissors for the tape. Use fine side cutters for the coil. Dull tools may crush or twist it.
Place the stop over the coil and tape. Its opening faces the zipper edge. Press it with narrow pliers using two controlled squeezes.
Fold the tape toward the back. Stitch across both layers with strong polyester thread. Make at least eight tight passes.
Move the slider slowly under light tension. It should stop before the raw edge. Test it more than once.
Shorten from the bottom when possible. Reattach a stop, then cover the cut tape with binding. Folding excess tape inside also looks clean.
Yes, but test scrap fabric first. Excessive heat can melt the coil or stain pale fabric. This method is not foolproof.
Inspect hidden seam allowances before trimming. They can change the finished length. I once trusted a flat measurement too much.
A small tab can reinforce the area and reduce skin irritation. Trim loose threads carefully. Do not cut the new stitches.
Shortening a nylon coil zipper is a practical skill that can improve the fit and finish of many sewing projects. This guide explains how to shorten a nylon coil zipper accurately by measuring and marking the desired length before making any cuts. Depending on the project, you can remove and reattach the bottom stop, trim the zipper from the top and add new top stops, or create secure hand-stitched stops when specialized hardware is unavailable.
Each method has its own advantages. Bottom-stop replacement is useful when the zipper must retain a clean, functional lower end, while top trimming works well when extra length is removed from the upper section. Hand-stitched stops offer a simple, flexible solution for custom garments, bags, and home sewing projects. By selecting the appropriate technique and securing the zipper ends carefully, you can achieve a neat, durable result without damaging the coil or slider.

Gemify zipper