How to Sew an Invisible Zipper Without a Special Foot

Time:2026-11-05 Author:Isabella
0%

An invisible zipper can give a skirt, dress, or cushion cover a clean finish, even when you do not own a special zipper foot. The process is less mysterious than it looks. Small details matter, though. A carefully pressed seam allowance and steady stitching often make more difference than extra equipment.

This guide explains how to sew an invisible zipper without a special foot, using an ordinary zipper foot or a standard presser foot with an adjustable needle position. You will learn how to prepare the zipper tape, keep its coils open, and align the teeth with the fabric’s seam line. A few pins or hand-basting stitches can help hold slippery fabric in place. Take your time near the bottom stop. That spot can be fiddly. Stitching too close to the coils may catch them, while sewing too far away can leave the zipper visible. Test your setup on a fabric scrap first, especially if your machine has not been used for this technique.

The result may not look perfect on the first try, and that is normal. I would rather unpick a short section than force a crooked seam to behave. With clear steps and a little patience, you can make a neat closure using tools you already have.
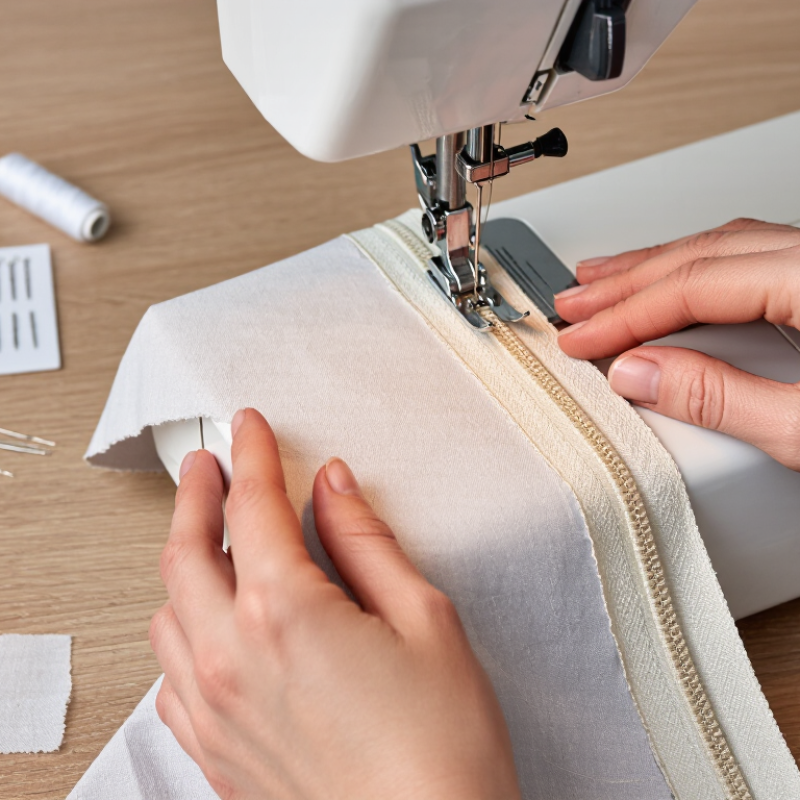
How to Sew an Invisible Zipper Without a Special Foot

Gather Materials and Prepare the Garment Opening

Before opening the seam, gather an invisible zipper, matching thread, fine pins, a hand-sewing needle, fabric scissors, and an iron. A regular zipper foot can work; no specialty foot is required. Check the zipper length against the garment opening, leaving room for the top seam allowance. Press the seam allowances flat, then mark the opening’s upper and lower points with tailor’s chalk. A clear workspace helps. I still sometimes forget to check the zipper pull’s direction before pinning, so test its movement now.

Fabric content matters. Textile Exchange’s Materials Market Report 2024 estimates that global fiber production reached 124 million tonnes in 2023, with polyester accounting for about 57 percent. That figure is a useful reminder that garments vary widely in fiber and behavior. Check the care label, and test pressing on a hidden scrap first; heat can flatten or shine some fabrics. Align the garment edges carefully, and stabilize a stretchy or loosely woven opening with lightweight stay tape. Don’t stretch it.

Tips: Baste the opening by hand before stitching. Close the zipper and check that the teeth sit just behind the fabric fold. A small mismatch is easier to fix now than after sewing.

Prepare the Garment Opening for an Invisible Zipper

Planning estimates for a straightforward garment opening: gather supplies, mark the opening, stabilize the fabric if needed, baste the seam, and press the seam allowances open. Actual time varies with fabric and experience.

Align and Pin the Invisible Zipper to the Fabric

Align and Pin the Invisible Zipper to the Fabric

Lay the fabric pieces right side up, with their top edges level and seam allowances marked. Open the zipper and place one half face down on the first fabric piece. Keep its coil just inside the marked seam line, not on the raw edge. Match the zipper stop to the planned neckline or waistband edge. Small shifts matter. Measure both sides from the top; even a few millimeters can leave the finished waistband uneven. Pin through the tape and fabric, keeping pins clear of the coil. Repeat on the other side, checking that horizontal seams and printed lines meet across the zipper.

Before stitching, close the zipper and inspect the alignment from the right side. Baste by hand if the fabric is slippery or stretchy; it takes time, but prevents layers from creeping. The U.S. EPA’s 2018 Advancing Sustainable Materials Management report recorded 17.03 million tons of textiles generated in the United States. Careful pinning cannot address textile waste at that scale, but it can help avoid needless garment rework. I still check the match twice. Pinning is not a guarantee: bulky fabric can shift, so sew a short test section and reassess before finishing the seam.

Baste Each Side of the Zipper in Place

Mark the seam line and zipper placement on both fabric pieces before opening the zipper. Lay one fabric piece right side up, then place the zipper face down with its coil aligned to the marked seam line. Gently roll the coil open with your fingers; avoid pressing it flat with a hot iron. Open the zipper fully.

Hand-baste the first zipper tape to the fabric, keeping your temporary stitches just inside the seam allowance and away from the coil. Use small, even stitches, especially near the top stop. Repeat on the other side, matching the second tape to its seam mark. Go slowly. A few extra minutes here can prevent a crooked finish.

Close the zipper and check that the waistline or top edges meet evenly. If they shift, remove the basting and adjust one tape before sewing. Even careful basting can leave a slight ripple, particularly on slippery fabric. When the alignment looks right, sew each side with an ordinary zipper foot, stitching close to the coil without catching it. The zipper should open and close smoothly.

Stitch Along the Coils with a Standard Zipper Foot

A special invisible-zipper foot is convenient, but a standard zipper foot can guide stitching close to the coils. Press the zipper tape flat, then roll each coil outward with your fingertip. Keep the iron away from the coil itself. Mark the waistline on both tapes so the seam stays level. Practice first. With the zipper open, place one coil beside the foot’s inner edge and sew slowly. Adjust the needle position only if your machine allows it, and turn the handwheel carefully to check clearance before stitching. Aim to catch the tape close to the coil, not the coil itself. This takes patience; my test stitches can still wander.

After stitching both sides, close the zipper and check that the waist marks meet. Test the zip. If it ripples, unpick a short section and try again; forcing a crooked seam rarely improves it. WRAP’s 2012 Valuing Our Clothes report estimates that extending a garment’s active life by nine months can reduce its carbon, water, and waste footprints by 20–30%. A neat repair helps a garment stay wearable, though this zipper method is less forgiving than using a dedicated foot. Don’t rush the last few stitches near the slider.

Close the Seam and Test the Zipper

With the zipper sewn in, close the remaining seam below its bottom stop. Place the fabric right sides together and match the raw edges. Feel for the stop with your fingers; begin stitching just beneath it, not over the teeth. Use a regular zipper foot if it gives you better control, or a standard foot with the needle positioned close to the seam. Keep the seam allowance even. A few pins help. Stitch slowly past the join, where the zipper tape can make the fabric feel thicker. Backstitch lightly at the start.

Before trimming the thread, open the zipper fully and check that the slider moves freely. Test it several times. Watch the seam where the closed stitching meets the zipper; the edges should meet without a gap or bulky ridge. If the slider catches, avoid pulling hard. Check for a stray thread or stitches too close to the teeth, then unpick only the problem area and sew it again. A slight ripple can remain, especially in soft fabric, and it may be worth easing the seam rather than forcing it flat. Press the seam gently from the wrong side, using a cloth between the iron and fabric if needed. Recheck the zipper after pressing.

FAQS

Where should the invisible zipper sit on the fabric?

Place each zipper half face down, with the coil just inside the marked seam line. Keep the top edges level.

How do I keep both zipper sides aligned?

Measure from the top edge on both sides. Match the zipper stop to the planned neckline or waistband edge. A few millimeters matter.

Should I check the zipper before sewing?

Yes. Close it and inspect the fabric from the right side. Check that seams and printed lines meet.

What helps prevent slippery fabric from shifting?

Hand-baste the layers before machine stitching. It takes extra time. I still find stretchy fabric can move.

Can I use a standard zipper foot?

Yes. Press the tape flat, roll each coil outward, and guide the stitching close to it.

How can I avoid sewing into the zipper coil?

Keep the coil beside the foot’s inner edge. Turn the handwheel carefully to check needle clearance before sewing.

What should I do if the zipper seam ripples?

Unpick a short section and sew it again. Test the zipper before finishing the seam.

How can I check the waistband alignment?

Mark the waistline on both zipper tapes. Close the zipper and confirm the marks meet. Small mismatches can remain.

Conclusion

Learn how to sew an invisible zipper without a special foot using a standard zipper foot and a few careful steps. Start by gathering your zipper, fabric, thread, pins, and sewing tools, then prepare the garment opening so its edges are even and ready to sew. Align the zipper tape with the fabric, keeping the coils positioned neatly along the seam line, and pin both sides in place. Baste each side to prevent shifting while you work.

With the standard zipper foot attached, stitch close to the zipper coils on each side, moving slowly to keep the seam straight and avoid catching the coils. Once the zipper is secured, close the remaining garment seam below it, taking care to match the fabric edges. Finish by fastening and unfastening the zipper several times to check that it moves smoothly and that the seam lies flat.

Isabella

Isabella

Isabella is a dedicated marketing professional with a sharp focus on driving brand growth and engagement through strategic content creation. With an extensive background in digital marketing, she combines her passion for storytelling with her keen understanding of industry trends to deliver......